Implementing Eureka Discovery Server with Spring Boot

I'm a seasoned Software Engineer with over half a decade of experience shaping the world of software development. My passion is anchored in writing code that is not just efficient, but also elegant and clean. An advocate for continuous improvement, I am forever on the hunt for the most cutting-edge developments in our dynamic industry.
Spring Boot has made building microservices very popular due to its simplicity and productivity boost. When working with microservices, service discovery is a crucial part. Netflix Eureka is one such service discovery server that integrates smoothly with Spring Boot applications. In this blog post, we’ll see how to implement a Eureka Discovery Server using Spring Boot.
Setting Up Eureka Server
Let's start by setting up the Eureka Server.
Step 1: Create Spring Boot Project
Create a new Spring Boot project using either Spring Initializer or your IDE. Name the project eureka-server. For dependencies, just select Eureka Server.
Step 2: Configure Application Properties
Open the application.properties file (or application.yml if you prefer YAML) and add the following configuration:
spring.application.name=discovery-server
server.port=8761
eureka.client.register-with-eureka=false
eureka.client.fetch-registry=false
eureka.client.service-url.default-zone=http://localhost:8761/eureka/
This configuration sets the application name, the server port, and tells the Eureka Server not to register with itself.
Step 3: Enable Eureka Server
To enable Eureka Server, open the main application class and add the @EnableEurekaServer annotation:
@SpringBootApplication
@EnableEurekaServer
public class DiscoveryServerApplication {
    public static void main(String[] args) {
        SpringApplication.run(DiscoveryServerApplication.class, args);
    }
}
Step 4: Start Eureka Server
Run your Spring Boot application by either running the main class from your IDE or using Maven/Gradle from the command line:
mvn spring-boot:run
You can access the Eureka Dashboard at http://localhost:8761.
Registering a Spring Boot Application with Eureka Server
Now that our Eureka Server is up and running, let’s create a simple Spring Boot application and register it with our Eureka Server.
Step 1: Configure Application Properties
Open the application.properties file and add the following configuration:
spring.application.name=fetherkode-api
server.port=8090
eureka.client.service-url.default-zone=http://localhost:8761/eureka/
This configuration sets the application name, server port, and specifies the URL of the Eureka Server.
Step 2: Enable Discovery Client
Open the main application class and add the @EnableDiscoveryClient annotation:
@SpringBootApplication
@EnableDiscoveryClient
public class FetherkodeApplication {

    public static void main(String[] args) {
        SpringApplication.run(FetherkodeApplication.class, args);
    }

}
Step 3: Create a Simple REST Endpoint
Create a simple REST controller to test our service:
@RestController
public class HelloController {
    @GetMapping("/hello")
    public String sayHello() {
        return "Hello from Discovery Client!";
    }
}
Step 4: Start the Spring Boot Application
Run the Spring Boot application as we did earlier.
Testing
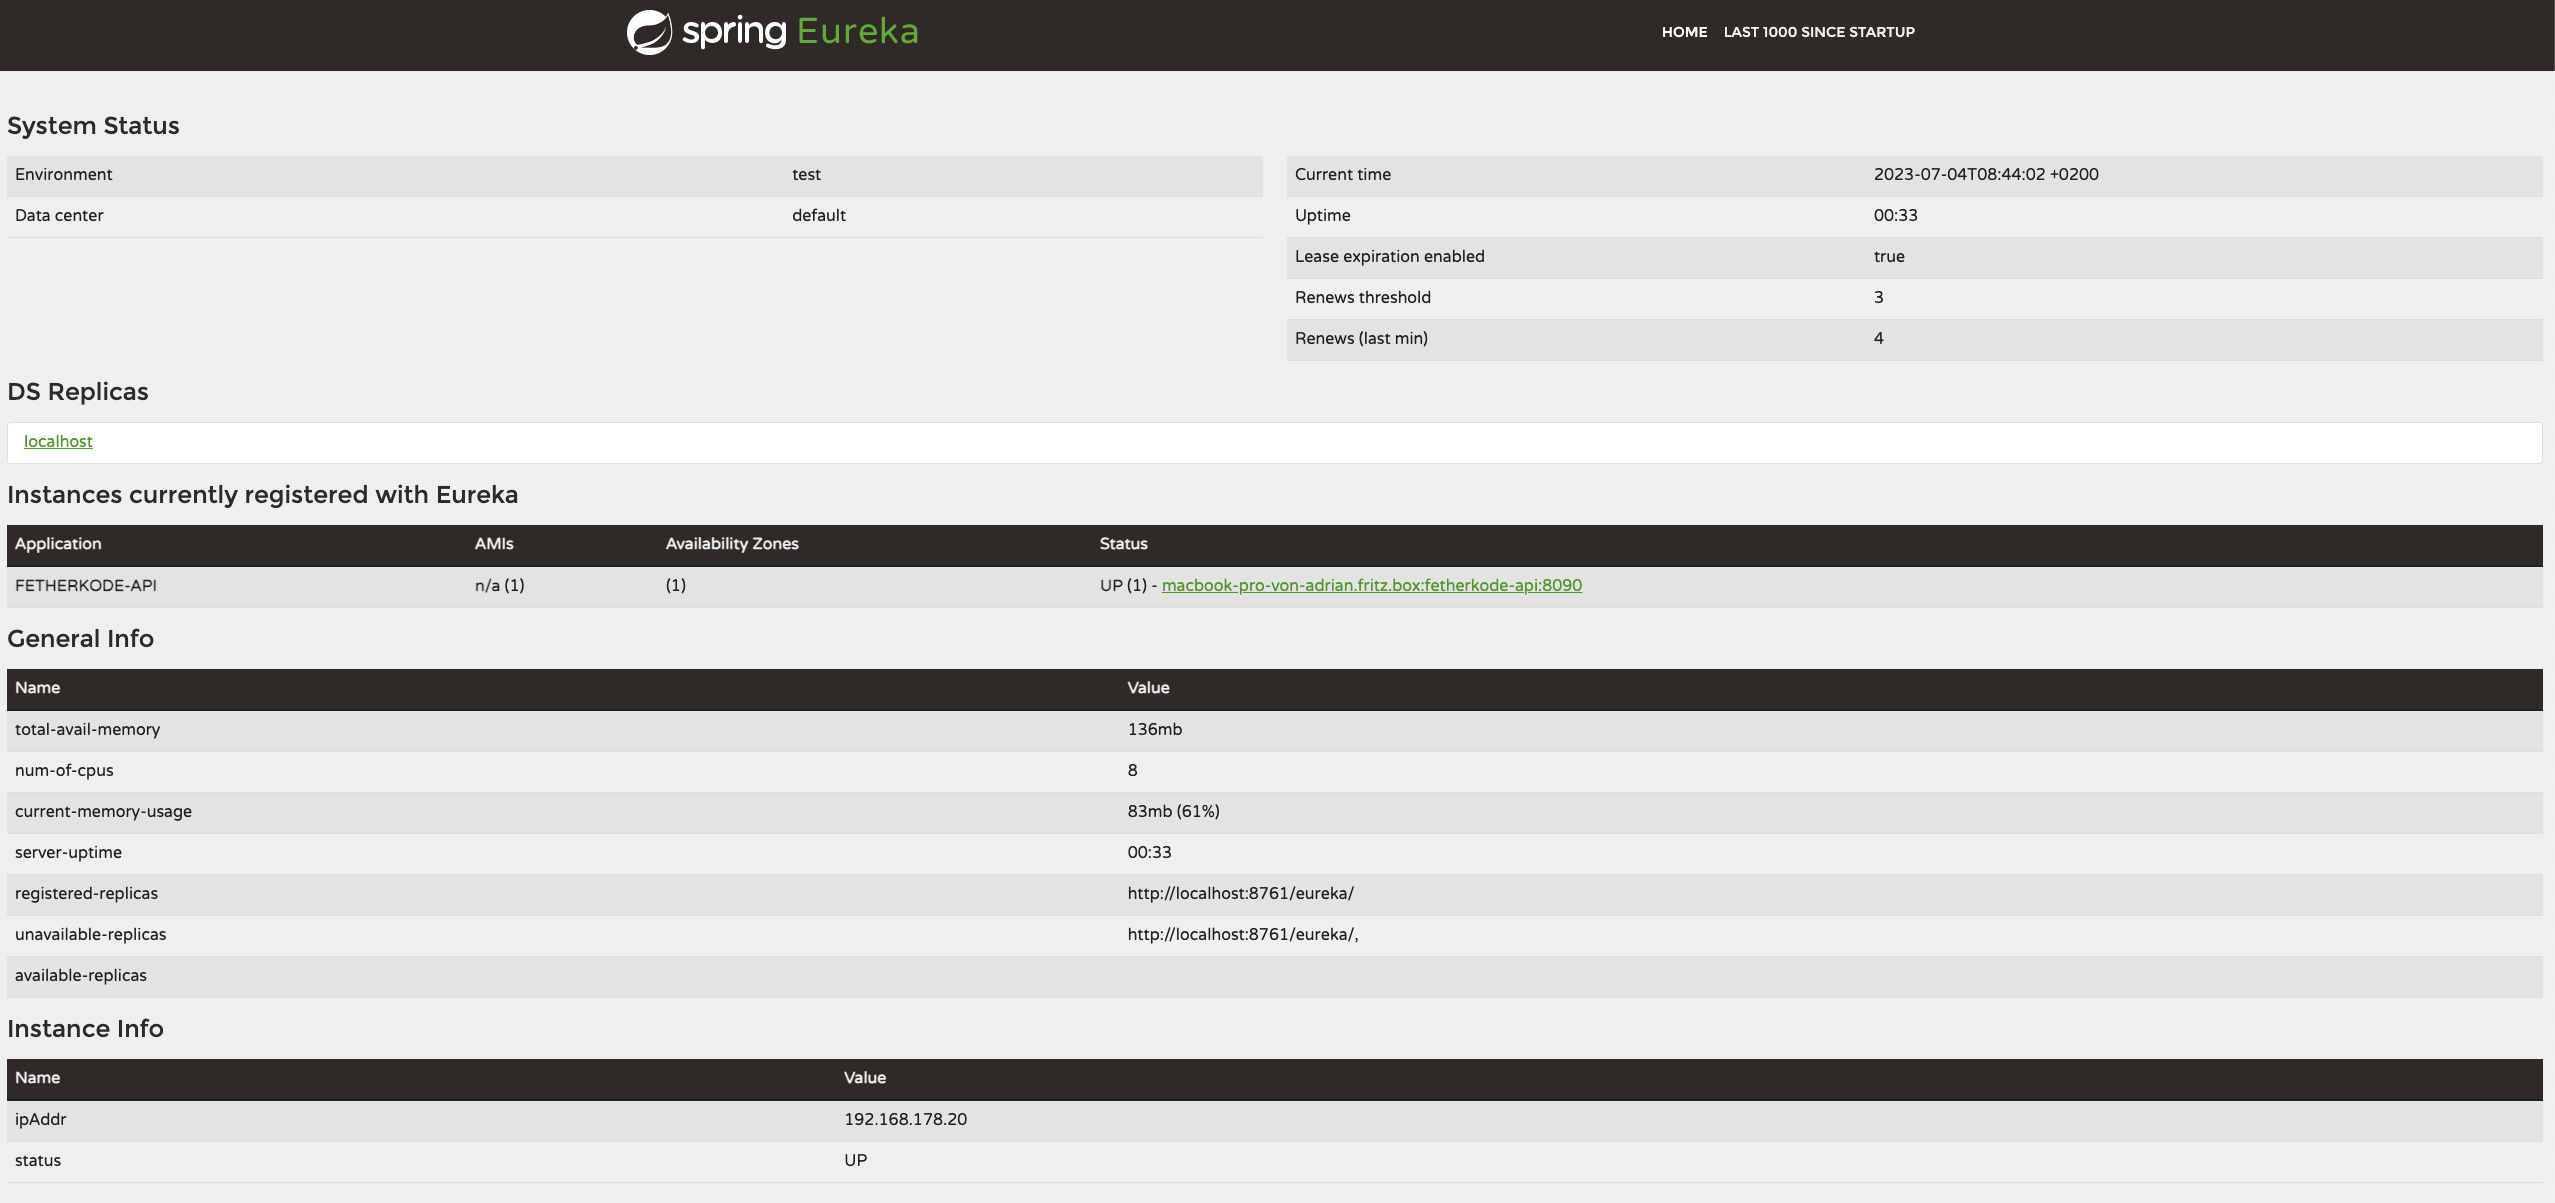
As you can see in the image above, when we go to the dashboard fetherkode-api is registered. You can also test the service by accessing http://localhost:8090/hello.
Conclusion
You’ve successfully set up a Eureka Discovery Server and registered a Spring Boot application with it. Service discovery is vital in microservices architecture for communication between services. Eureka is just one option among others like Consul or Apache ZooKeeper. However, its ease of integration with Spring Boot makes it a popular choice. Happy coding!